uploading of video clips
This post is all about the process in uploading my video clips to the editing software. This is to show the beginning of creating my video and how I managed to transfer my clips to the computers system and then to adobe elements.
When making my video I came across a difficulty. I used my phone to film my video so I had to transfer the clips from my phone to the computer. To do this I had to use an android cable and connect my phone to the computer. I then opened the Adobe elements editing software and tried to add my clips on the software. The problem I had was it wasn't letting me put my clips on Adobe elements. To solve this problem I didn't have to do much. All I had to do is transfer my clips on my phone to save them on my computer, then I could move my clips from my computer to the Adobe elements editing software.
Here's where I saved my clips:
-Step 1
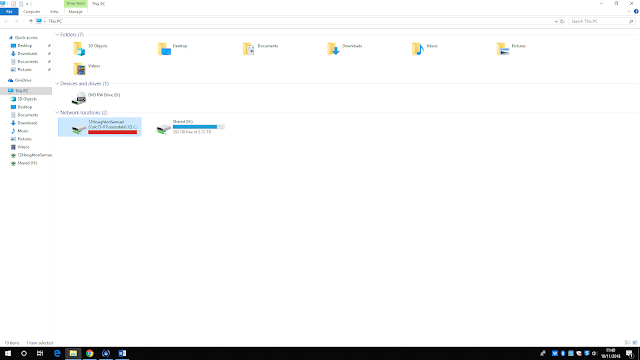
First I went into the my computer area and selected my account
-Step 2
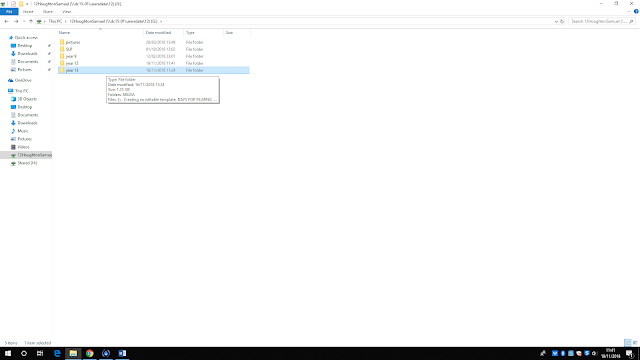
I then went into the year 13 folder
-Step 3
Once going into my year 13 folder I added my clips into a folder named MEDIA

-Step 4
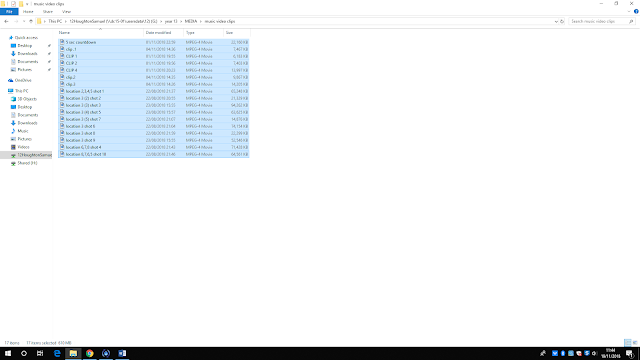
For the final step you have to go into music video clips folder, this folder has all of my clips in

-This last screenshot shows the music video clips folder. As presented you can see all the clips I used in my video all stored in this one folder.
When making my video I came across a difficulty. I used my phone to film my video so I had to transfer the clips from my phone to the computer. To do this I had to use an android cable and connect my phone to the computer. I then opened the Adobe elements editing software and tried to add my clips on the software. The problem I had was it wasn't letting me put my clips on Adobe elements. To solve this problem I didn't have to do much. All I had to do is transfer my clips on my phone to save them on my computer, then I could move my clips from my computer to the Adobe elements editing software.
Here's where I saved my clips:
-Step 1
First I went into the my computer area and selected my account

-Step 2
I then went into the year 13 folder

-Step 3
Once going into my year 13 folder I added my clips into a folder named MEDIA

-Step 4
For the final step you have to go into music video clips folder, this folder has all of my clips in

-This last screenshot shows the music video clips folder. As presented you can see all the clips I used in my video all stored in this one folder.


Comments
Post a Comment